Hello, everyone! Each week I will be posting an activity related to Arts & Innovation. None of these projects are required, and you can certainly alter them to fit materials you have at home or creative ideas you have. If you come up with something fun, please send me a picture or video! I would love to see what you are up to. --Ms. Dynia
Solar Dyeing, Part 2
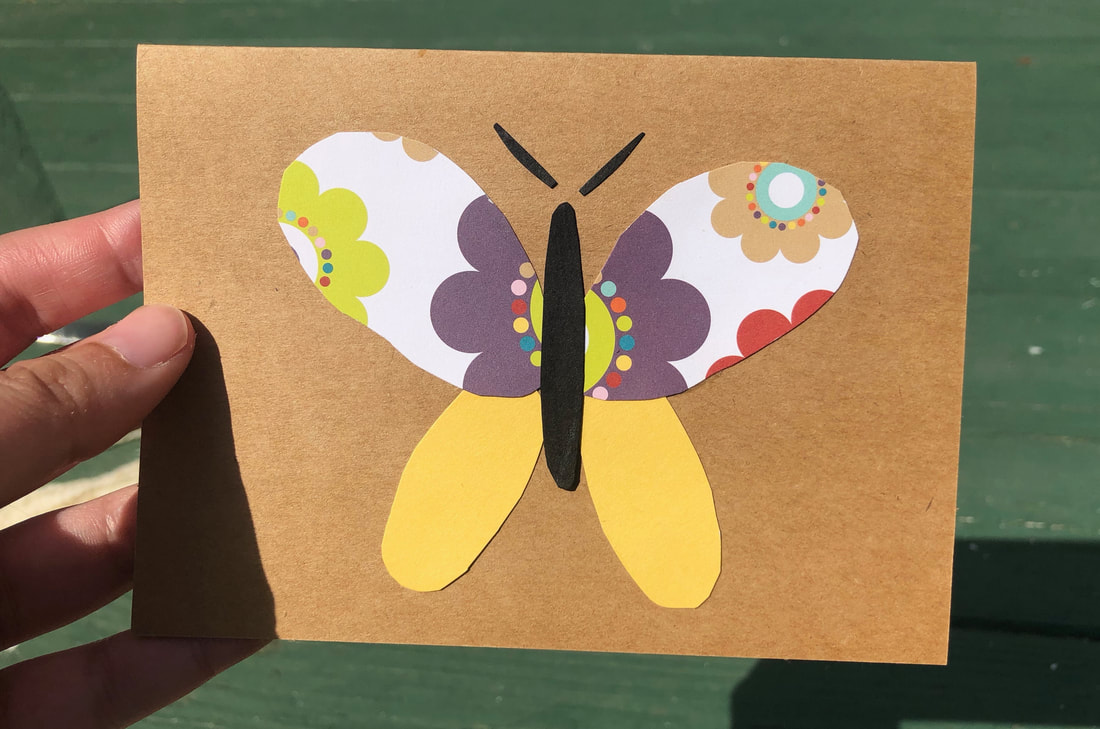
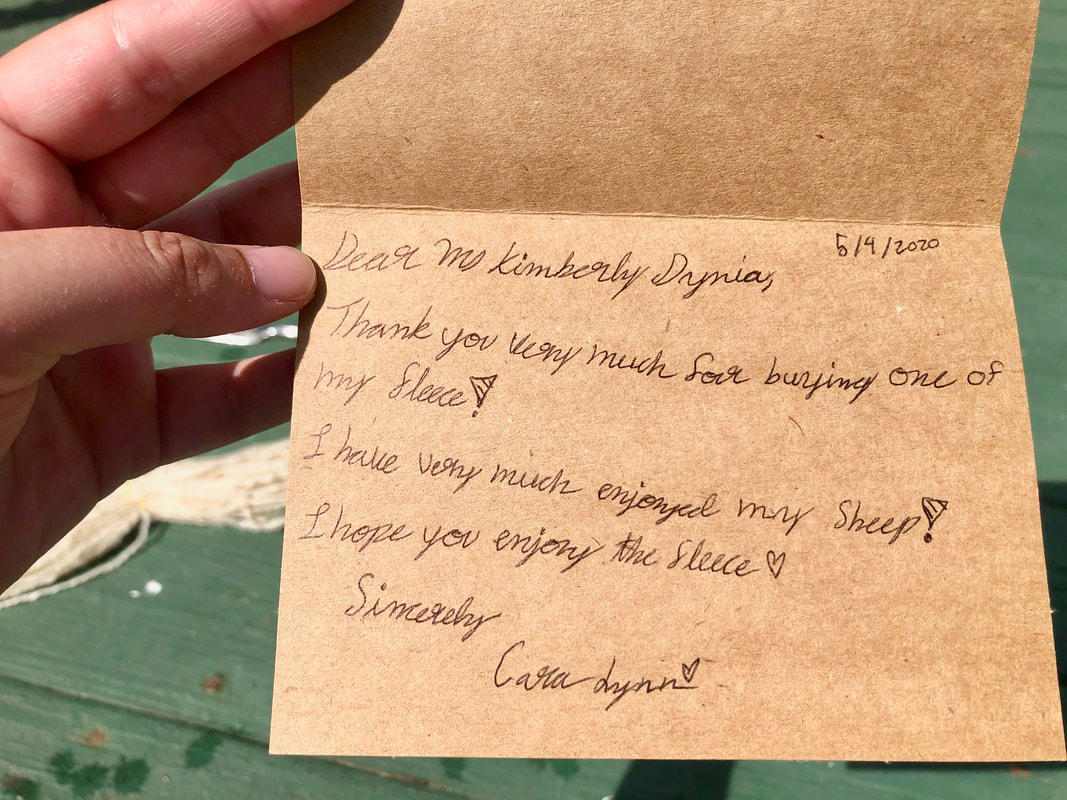
I finally caught an 85 degree day to dye my yarn! But first, I wanted to show you something from my fleece purchases. My favorite fleece that I bought was from a 12-year-old girl who raises Corriedale sheep as part of 4H. This is actually the 5th year that she has sold fleeces at the festival. When I opened the box, it had this lovely thank you note, which definitely makes me want to buy from her again. Thank you cards matter!
I finally caught an 85 degree day to dye my yarn! But first, I wanted to show you something from my fleece purchases. My favorite fleece that I bought was from a 12-year-old girl who raises Corriedale sheep as part of 4H. This is actually the 5th year that she has sold fleeces at the festival. When I opened the box, it had this lovely thank you note, which definitely makes me want to buy from her again. Thank you cards matter!
|
|
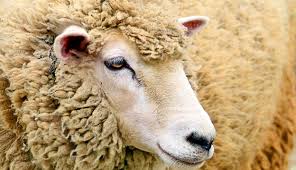
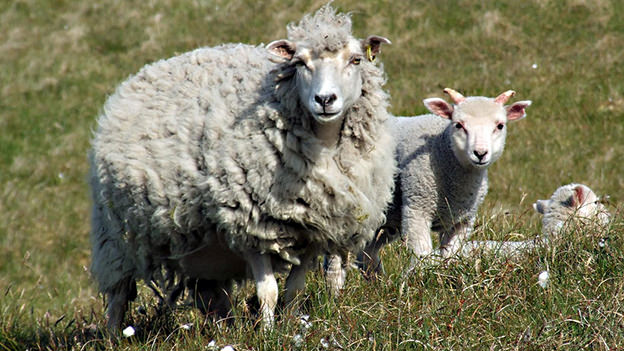
Corriedale Sheep
|
Now on to dyeing! Note: If I try solar dyeing again, I will leave my jar out in the sun for more than one day and use less food coloring. I lost a lot of dye when I rinsed it out, and you will see that I had to set my dye another way.
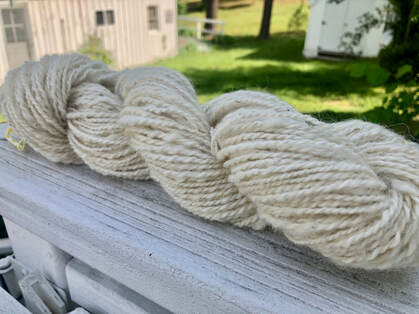
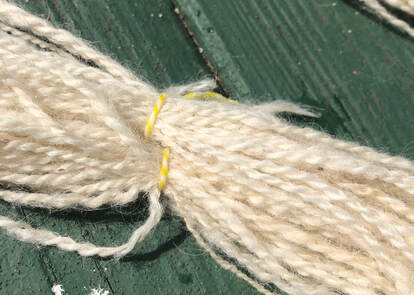
Here is what my yarn looked like after I plied two strands together and set the twist by soaking it in hot water and then hanging it up to dry.
Here is what my yarn looked like after I plied two strands together and set the twist by soaking it in hot water and then hanging it up to dry.
To dye your yarn, you need to first wind it into a hank. Take your ball of yarn and wind it around a chair, box, or a sibling's hands to make a big loop. Use more yarn or string to tie the hank of yarn in at least 3 or 4 places. This helps keep it from getting tangled. I tied mine in a figure 8, but just going around works fine too.
Next, fill a sink, small tub, or bucket with hot water out of the tap. Add a good splash of white vinegar to the water and swirl it around to mix. Next, add your hank of yarn. Make sure you push it all under the water so it is completely wet, but don't swish it around too much. Use a tool like a spoon or wear dishwashing gloves if the water is too hot.
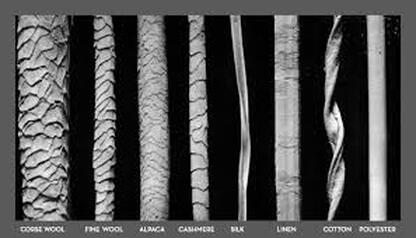
The individual hairs of wool are coved in scales. When they come in contact with warm water, they open up. If they rub together, they will grab together and not let go. This will cause the yarn to felt, and this is the reason why a wool sweater shrinks if you put it in a hot washing machine and dryer. Check out what these different fibers look like under a microscope:
The individual hairs of wool are coved in scales. When they come in contact with warm water, they open up. If they rub together, they will grab together and not let go. This will cause the yarn to felt, and this is the reason why a wool sweater shrinks if you put it in a hot washing machine and dryer. Check out what these different fibers look like under a microscope:
Let your yarn soak in the vinegar/water solution for at least 20 minutes. While it is soaking, prepare your dye.
How much you need will depend on the size of your jar and how much yarn you are using. I just experimented to figure out how much I needed.
How much you need will depend on the size of your jar and how much yarn you are using. I just experimented to figure out how much I needed.
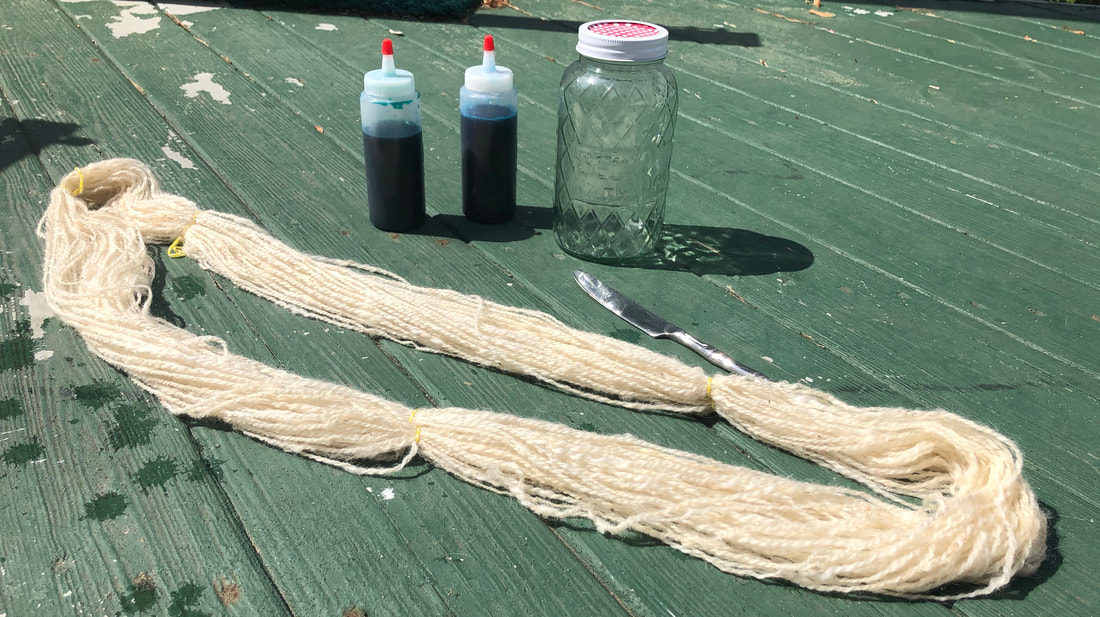
I ended up using 4 squirt bottles of dye for my jar.
I used bottles meant for candy making, but you can use mugs or small bowls for mixing since everything we are using is food safe. You can also choose if you want your yarn to be all one color, or if you want it to have different colors. I started by adding a splash of vinegar to each of my quirt bottles. I then added hot water from the tap. Finally, add I added my dye and mixed. I used food coloring, but the tablets for dyeing Easter eggs and sugar-free Kool-Aid work well too. The dye will dry lighter. To get a better idea of the final color, dip a paper towel into the mixture. Keep playing until you like the color!
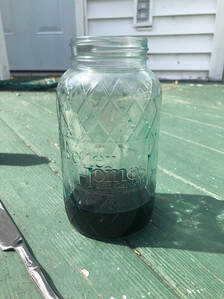
One of my bottles had a dark teal color, and I added that to the bottom of my jar first.
I used bottles meant for candy making, but you can use mugs or small bowls for mixing since everything we are using is food safe. You can also choose if you want your yarn to be all one color, or if you want it to have different colors. I started by adding a splash of vinegar to each of my quirt bottles. I then added hot water from the tap. Finally, add I added my dye and mixed. I used food coloring, but the tablets for dyeing Easter eggs and sugar-free Kool-Aid work well too. The dye will dry lighter. To get a better idea of the final color, dip a paper towel into the mixture. Keep playing until you like the color!
One of my bottles had a dark teal color, and I added that to the bottom of my jar first.
I then took my yarn out of the vinegar/water solution, squeezed it out, and stuffed it in my jar. I poked it around with my knife to make sure the dye was getting into the center of the yarn.
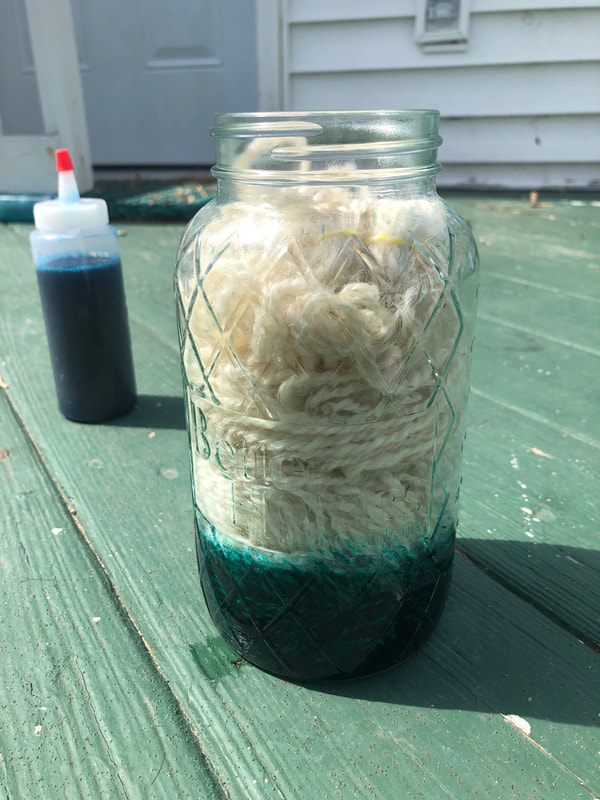
I then took my second bottle, which contained purple, and added it to the top.
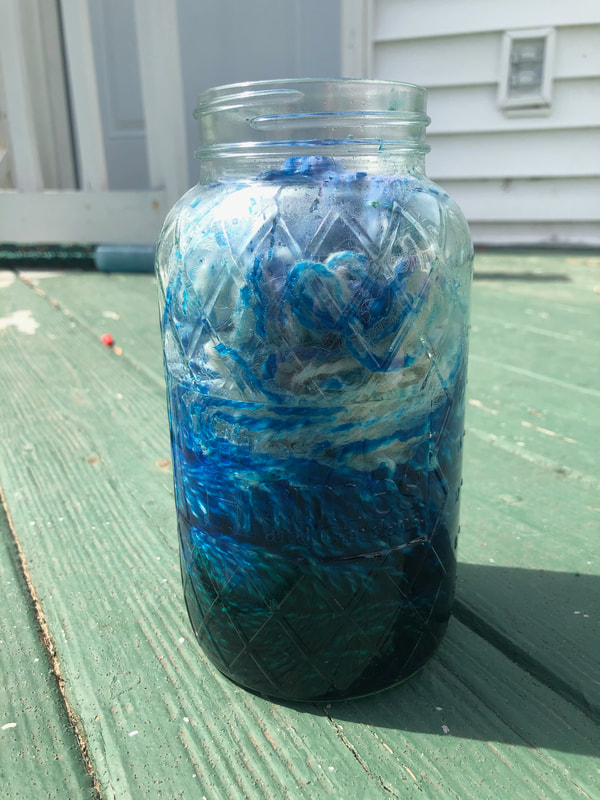
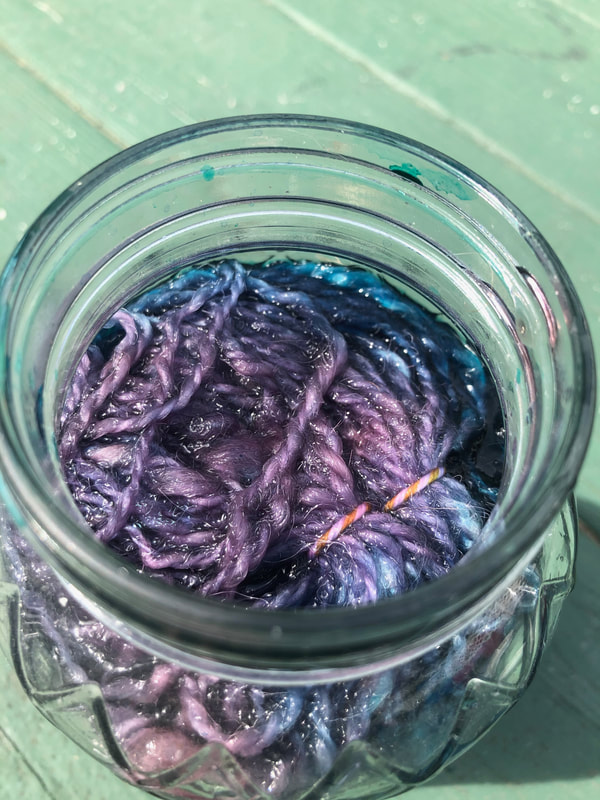
I poked that a little, but if you look carefully, you can see that I didn't mix the colors. The bottom the jar looks more green, while the middle looks more blue. It turns out I didn't have enough dye, so I went back in the house and mixed up a light teal color. I added that on top next, aiming for the yarn that was still white.
I poked some more, and that STILL wasn't enough, so I mixed up a bottle of light purple, and that finally filled up my jar.
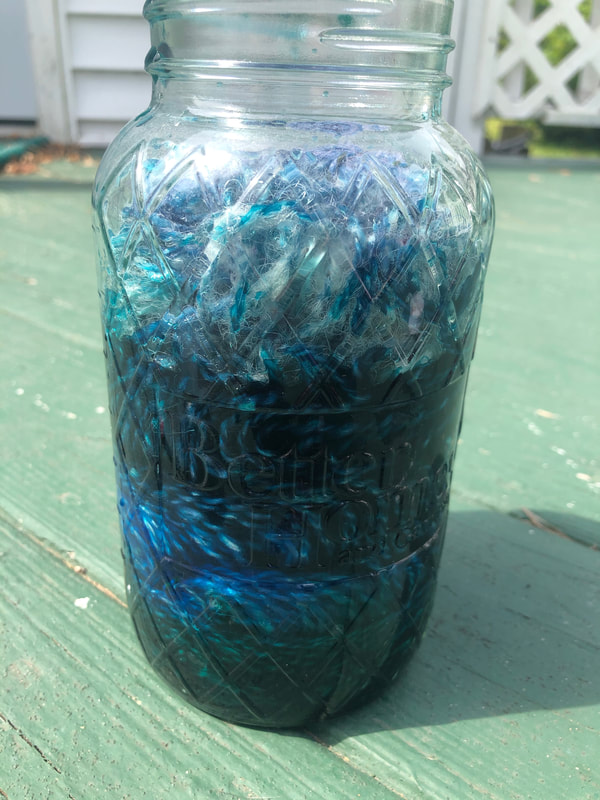
I put a lid on my jar and set it out in a really sunny place. If you have a lot of shadows, you might need to move your jar throughout the day to keep it in the sun. I put mine on top of a dark paving stone to increase the temperature. A black trash bag would also work.
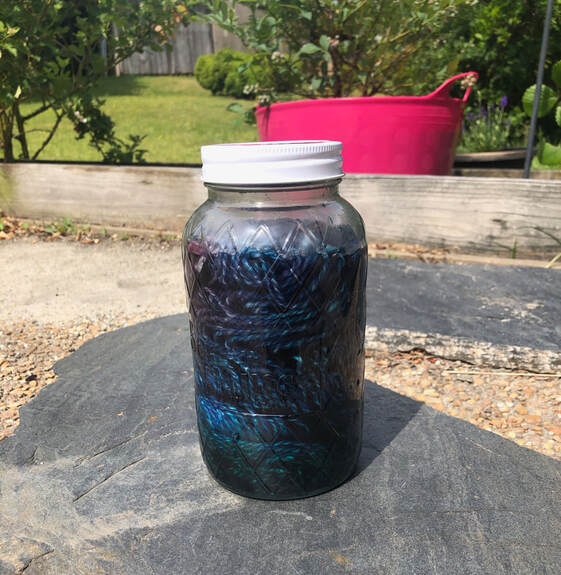
I put my jar out at about 10:45 in the morning. When I checked it at 4:00 p.m., my jar was hot and I could see condensation on the inside. However, when I tilted the jar, there was still a lot of color in my water.
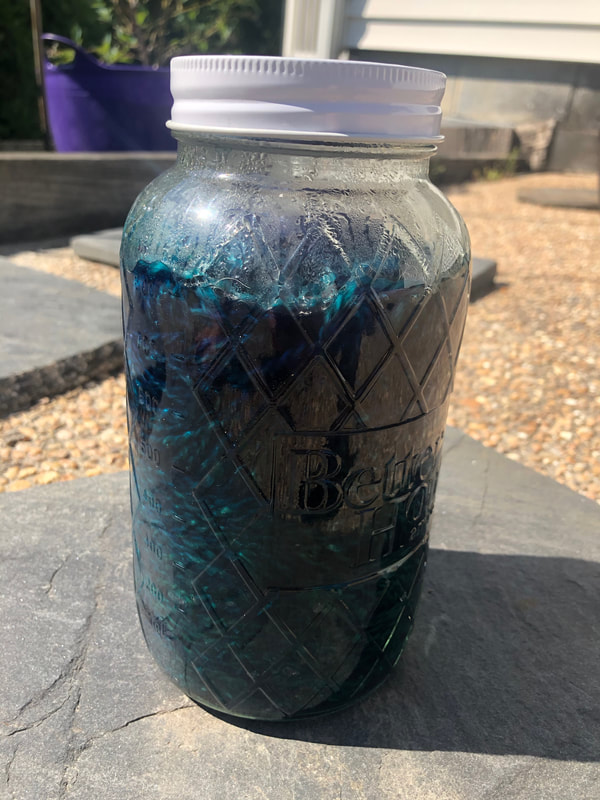
I checked again at 7:00 when the sun was starting to go down, and the water looked like it was pretty clear, so I took it inside. When I dumped out the water, it was almost completely clear, with just a little blue dye. I then filled up my plastic tub with warm water, and I added my yarn to soak. A TON OF FOOD COLORING CAME OUT. I think if I had used less food coloring and left it out in the sun longer, less would have washed out.
So I soaked and squished for a while, but more color kept coming out. So I found a microwave safe dish that fit my yarn. I put about an inch of water in the bottom, splashed in some vinegar, and added the yarn. I then covered the dish with plastic cling wrap so it didn't dry out and popped the whole thing in the microwave. I microwaved it on high for two minutes, then let it rest for a few minutes. I repeated the cycle for about 16 minutes of microwaving total (I kind of lost track). Then I let it rest in the microwave until it was almost completely cool; it took at least a couple hours. Again, I didn't really keep track.
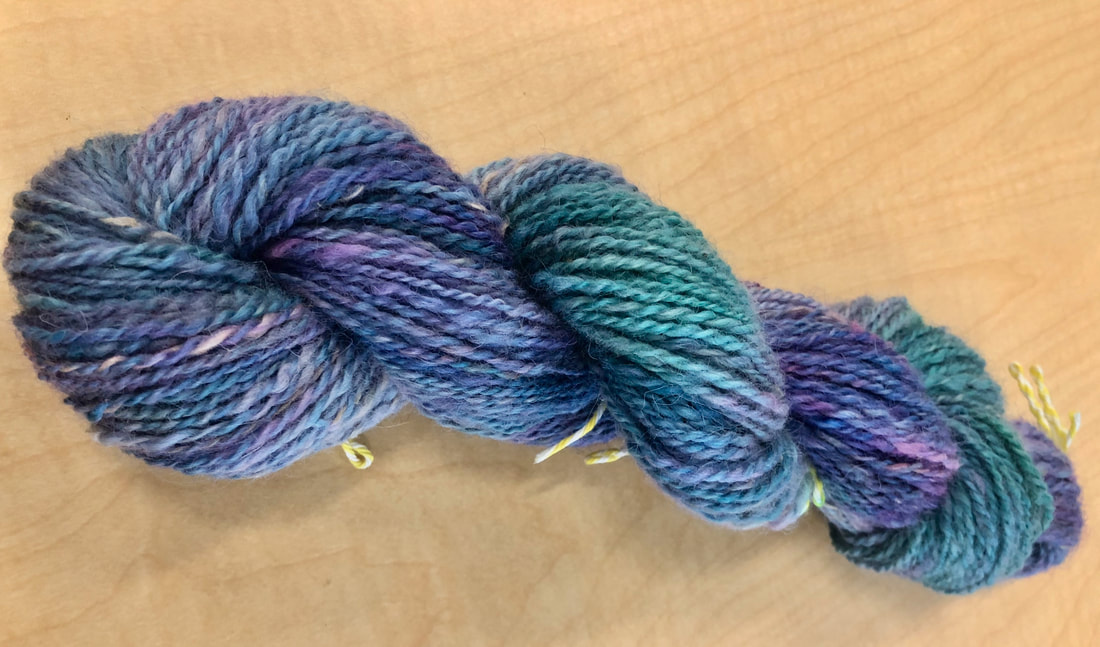
I rinsed it again in my tub of hot water, and this time no dye came out!
Finally, I hung it up too dry. And this was the result!
So I soaked and squished for a while, but more color kept coming out. So I found a microwave safe dish that fit my yarn. I put about an inch of water in the bottom, splashed in some vinegar, and added the yarn. I then covered the dish with plastic cling wrap so it didn't dry out and popped the whole thing in the microwave. I microwaved it on high for two minutes, then let it rest for a few minutes. I repeated the cycle for about 16 minutes of microwaving total (I kind of lost track). Then I let it rest in the microwave until it was almost completely cool; it took at least a couple hours. Again, I didn't really keep track.
I rinsed it again in my tub of hot water, and this time no dye came out!
Finally, I hung it up too dry. And this was the result!
Show me what you make! And check out below for ideas on how to use your fabulous new yarn! I'm going to weave mine into a scarf. I'll post a picture if I finish in time!
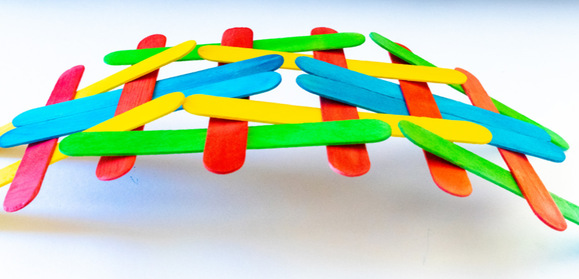
Cardboard Loom
Stick Weaving
Burlap Weaving
Circle Weaving
Loom Knitting with Toilet Paper Roll and Popsicle Sticks
Intro to Knitting
Cardboard Loom
Stick Weaving
Burlap Weaving
Circle Weaving
Loom Knitting with Toilet Paper Roll and Popsicle Sticks
Intro to Knitting
Solar Dyeing, Part 1
Welcome back! I took a break from posting last week, because we have an exciting fiber arts project to finish out the school year. I have been waiting for just the right weather, and I think we may get it this week. We are going to be solar dyeing yarn! During this project, we will be talking about some math and science behind our fiber arts project.
It's going to take us a few weeks to finish everything, but you can start gathering supplies now. In addition to these, you might need a few other odds and ends that you can easily find around the house.
1. You need some wool yarn. Make sure it is at least 70% real wool, not acrylic or other fibers. The dye won't stick to man-made fibers. My favorites are either Fisherman's Wool from Lion Brand or Classic Wool from Patons. I usually order them from Michaels or Jo-Ann's when I have a coupon. I suggest white, natural, or another light color because you will be able to see the new dye the best.
2. You need dye. I like using the Wilton's gel food coloring. Regular food coloring, sugar-free Kool-Aid, and leftover tablets from dyeing Easter eggs all work as well.
3. You will need a glass container with a lid large enough to fit your yarn. I am going to use a glass mason jar. If you have a glass container but no lid, you can try using a rubber band to secure a piece of aluminum foil over the top, but be careful not to spill your dye.
4. You will need some white vinegar.
Last weekend was the Maryland Sheep and Wool Festival. Here is a link to their website. Check out some of the cool things fiber artists are creating! And check out this video to see what Ms. Dynia bought at the virtual festival, and hear about the first steps of creating yarn from raw fleece.
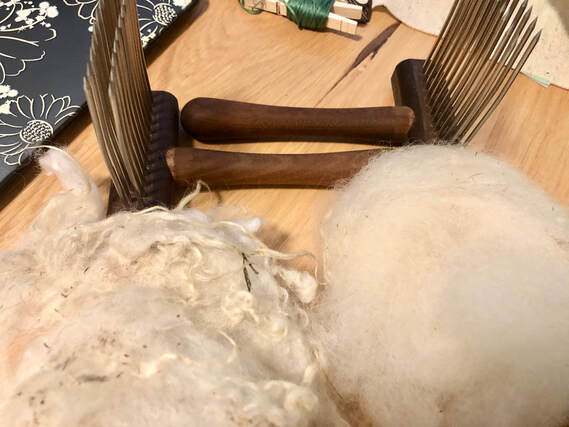
Here are the combs and wool I showed you in the video. You can see the uncombed wool on the left, and the combed wool on the right.
And here is a picture of Shetland sheep, which is the type of fleece I'm using.
I wanted to do a video to show you how to use a spinning wheel, which is what I am using to create my yarn, but I couldn't balance the camera and work at the same time. So here is a video of someone else teaching you how to spin. She does a lot of talking at the beginning of the video, so if you just want to see her working, skip forward to about the 4 minutes & 20 seconds mark. How many simple machines can you spot in a spinning wheel? (wheel & axel, lever, screw, incline plane, pulley, wedge)
I wanted to do a video to show you how to use a spinning wheel, which is what I am using to create my yarn, but I couldn't balance the camera and work at the same time. So here is a video of someone else teaching you how to spin. She does a lot of talking at the beginning of the video, so if you just want to see her working, skip forward to about the 4 minutes & 20 seconds mark. How many simple machines can you spot in a spinning wheel? (wheel & axel, lever, screw, incline plane, pulley, wedge)

Here is my yarn so far. There are about 2 ounces of fiber on here now. It's a little bumpy because my combs weren't fine enough to completely smooth out my fiber, so I'm going to let it rest overnight and then ply two strands together to make it look like the usual twisted yarn you are used to seeing.
April 27-May 1
Last week you built me something out of a cardboard box. This week, I want you to build me something digital! Use Tinkercad to create something, anything. Create a robot, or a scene from you favorite book. Design a whole town, or just one mailbox. When you are finished, download and send me your design!
Note: Students will need to create an account if they do not have one through class already. If your child needs help getting started (or if you are the child that needs help!), check out this Parent's Guide to Starting Kids in Tinkercad. YouTube also has great tutorials for help on projects! For example, the 4th graders started designing snowflakes using this video!
April 20-24
I've been doing a lot of online shopping lately, so this week I want you to build me something using a box. It can be anything, but I especially love creativity and moving parts! Don't forget, if you are cutting through heavy cardboard with scissors or a box cutter, please ask an adult for help!
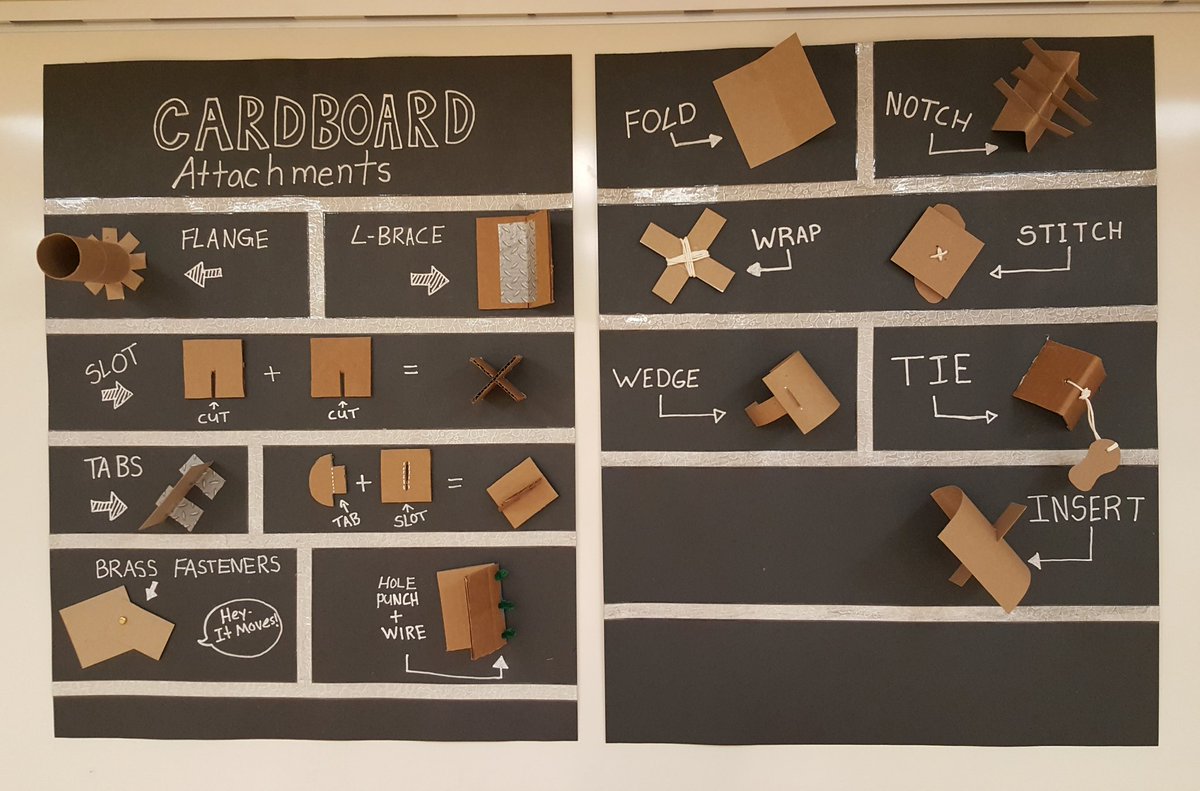
Here are some ideas for how to attach pieces of cardboard together.
I've been doing a lot of online shopping lately, so this week I want you to build me something using a box. It can be anything, but I especially love creativity and moving parts! Don't forget, if you are cutting through heavy cardboard with scissors or a box cutter, please ask an adult for help!
Here are some ideas for how to attach pieces of cardboard together.
So what can you do with a box? Build an arcade game? Or maybe a rocket ship? Can you make a habitat for your favorite stuffed animal? Or a racetrack for your cars? Can you create something to organize your art supplies? You are only limited by your imagination!
April 13 - 17
Two weeks ago, I challenged you to build a bridge. Well, I'm back to challenge you to build another one. Rather than coming up with your own unique design, you will practice following visual instructions to recreate a bridge idea from 1502. Leonardo da Vinci designed a self-supporting bridge to cross the Golden Horn, a river estuary between Constantinople and Galata. It would have been about 919 feet, which was about 10 times longer that most bridges at that time. Most of the bridges designed then would have needed piers for support, which would have hindered passing ships. Can a self-supporting bridge be constructed?
Materials: 18 popsicle sticks OR 12 popsicle sticks and 6 toothpicks/skewers
Optional Materials: paint or markers, cup, weights such as coins
Optional Step: To make it easier to follow the instructions, you may want to color code your popsicle sticks. Paint or color 4 popsicle sticks blue, 4 yellow, 4 green, and 6 red. If you are using the toothpicks/skewers, they should be red. You can also substitute other colors if desired.
Check out this link for instructions. You final bridge will look like this:
To test the strength of your bridge, balance a container or cup on the top of your bridge. Slowly add weights, such as coins, to see how much it can hold!
The kid in this video decided to make a working model. Please notice how he had a parent to help him, especially when he tested it!
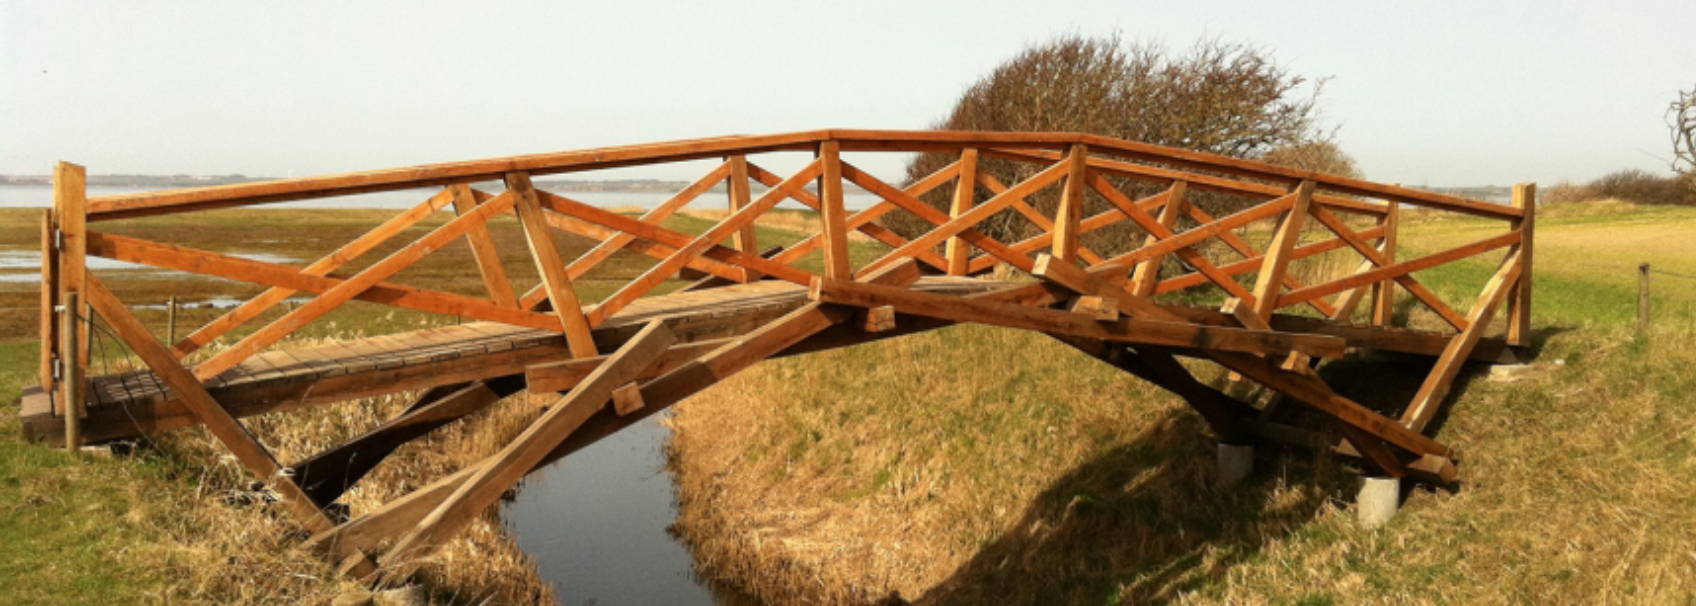
And here is a picture of a real bridge built using this construction technique.
The kid in this video decided to make a working model. Please notice how he had a parent to help him, especially when he tested it!
And here is a picture of a real bridge built using this construction technique.
April 6 - April 10
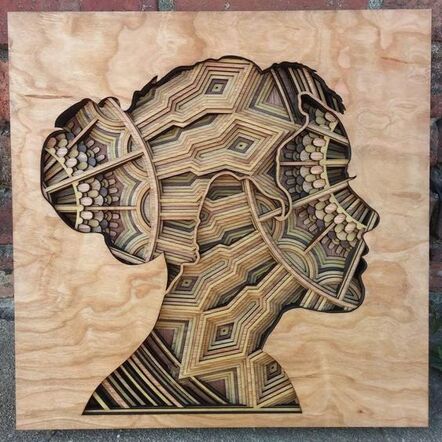
Being able to identify, manipulate, and create layers is an incredibly important skill in academics, technology, and the arts. We identify layers of meaning in novels; layer images and filters in Photoshop; layer simple shapes to produce complex figures in CAD modeling; combine layers to produce products with the laser cutter; layer foreground, middle-ground, and background figures in fine arts; layer instrumentals and lyrics in music compositions.
Being able to identify, manipulate, and create layers is an incredibly important skill in academics, technology, and the arts. We identify layers of meaning in novels; layer images and filters in Photoshop; layer simple shapes to produce complex figures in CAD modeling; combine layers to produce products with the laser cutter; layer foreground, middle-ground, and background figures in fine arts; layer instrumentals and lyrics in music compositions.
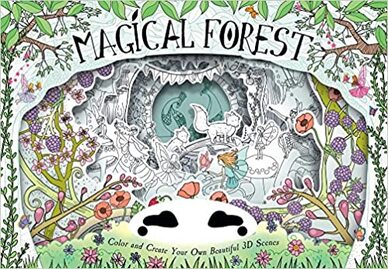
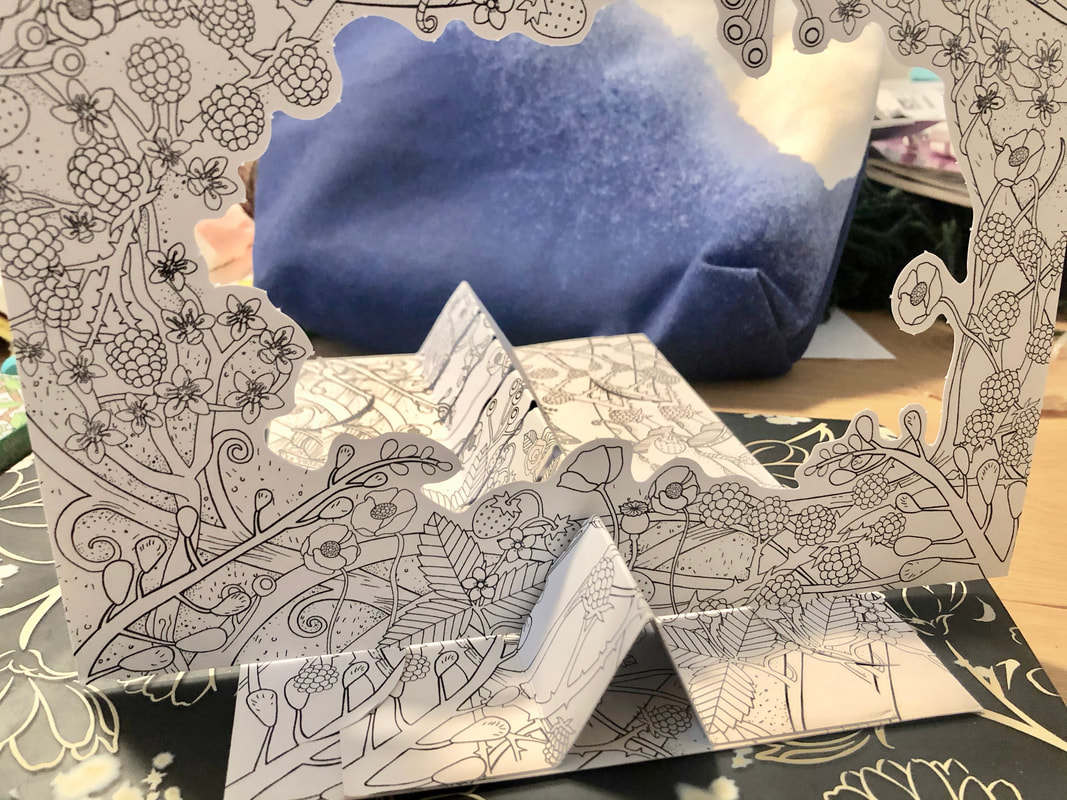
I found a great coloring book (because who doesn't love coloring books?) called Magical Forest 3D Colorscapes. They also have fantastical creature, ballerina, and underwater versions.
Basically, there are different cards to color. Then you punch out the center of the card to make a frame. Finally, you layer several of them together to make a 3D scene.
Basically, there are different cards to color. Then you punch out the center of the card to make a frame. Finally, you layer several of them together to make a 3D scene.
|
|
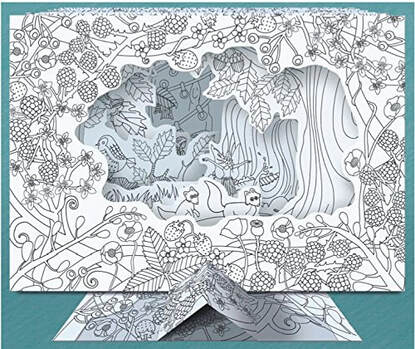
But you don't need a special coloring book to make your own 3D scenes at home!
You can use any kind of paper you have handy. My favorite is 8.5x11 white card stock cut in half. Regular printer paper, index cards, drawing paper, and construction paper all work, too. You will also need something to decorate your frames (paint, markers, colored pencils, etc.), scissors, and a ruler (for best results).
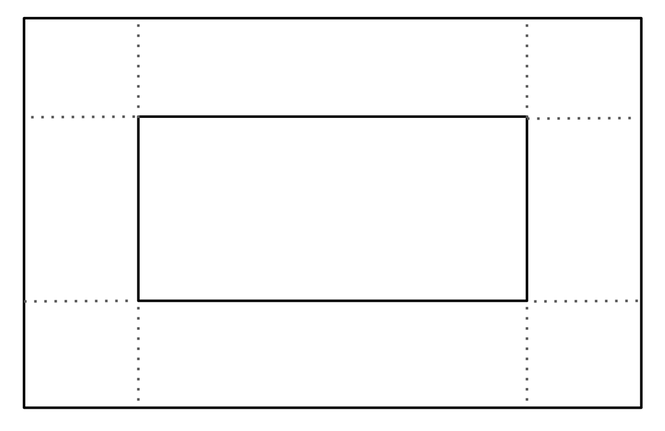
First, draw a box in the center of your paper. The easiest way is to measure in a consistent distance from each corner (2 inches, or whatever looks good), connect the dots, and erase the lines outside of your box. Draw your lines lightly; they are only for reference and will be erased later.
You can use any kind of paper you have handy. My favorite is 8.5x11 white card stock cut in half. Regular printer paper, index cards, drawing paper, and construction paper all work, too. You will also need something to decorate your frames (paint, markers, colored pencils, etc.), scissors, and a ruler (for best results).
First, draw a box in the center of your paper. The easiest way is to measure in a consistent distance from each corner (2 inches, or whatever looks good), connect the dots, and erase the lines outside of your box. Draw your lines lightly; they are only for reference and will be erased later.
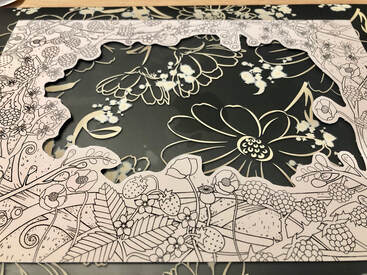
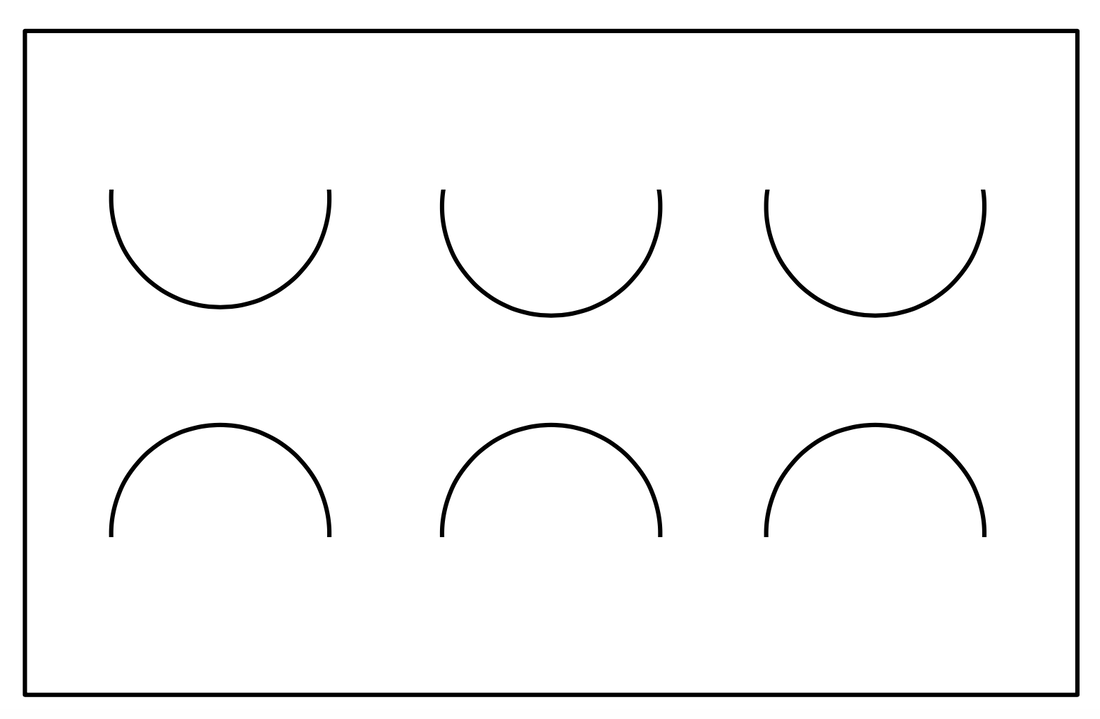
Next, draw one layer of your scene. Make your images hang out of the frame into the middle of the box. Color, and then cut out the middle. See the slide show below for examples.
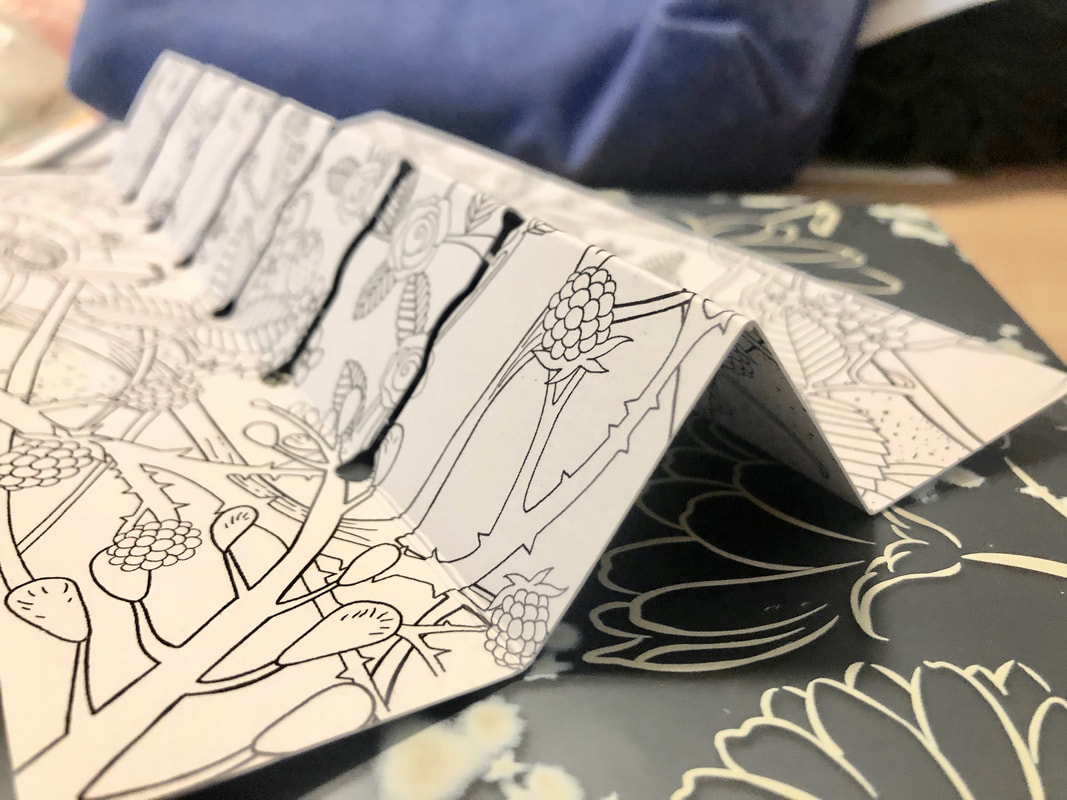
Once you have several scenes, build a base. You will need two pieces of paper. Just like the frames, I like to use an 8.5x11 piece cut in half.
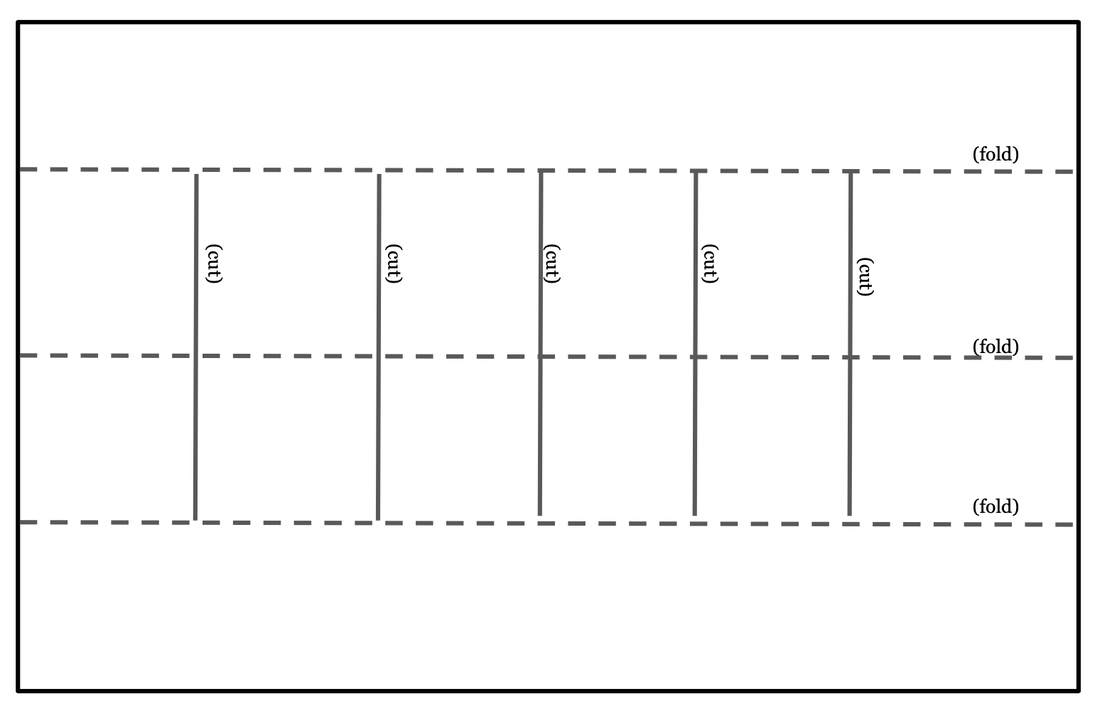
On your first piece, draw some half circles. Cut the lines to create tabs.
Fold the second paper into quarters. Cut slits perpendicular to the center fold, one for each of your scenes.
Finally, insert your folded paper into the tabs of the other base piece, and add your scenes. Move them around until you find an arrangement you like!
Once you have several scenes, build a base. You will need two pieces of paper. Just like the frames, I like to use an 8.5x11 piece cut in half.
On your first piece, draw some half circles. Cut the lines to create tabs.
Fold the second paper into quarters. Cut slits perpendicular to the center fold, one for each of your scenes.
Finally, insert your folded paper into the tabs of the other base piece, and add your scenes. Move them around until you find an arrangement you like!
|
|
Here are some ideas for inspiration!
March 30 - April 3
I had completely forgotten about how much I used to love The Magic School Bus series until I saw this episode recently. I don't want to give away too many details, but Ms. Frizzle and the gang have to rely on their construction skills to save the day. Even if you are in middle school, this episode is definitely worth watching!
As you watch, pay special attention to the different shapes they use when constructing different structures, especially the suspension bridge! What advice does Ms. Frizzle give about the base of any construction project?
Next, gather some supplies for your own building project.
You will need:
toothpicks
gumdrops
Alternate Materials: If you don't have gumdrops, try marshmallows, play-doh, styrofoam peanuts, pieces of apple, etc. Instead of toothpicks, you could cut straws into smaller pieces or roll and glue scrap paper into narrow tubes.
Optional Materials: string, plastic cup, small weights such as coins, popsicle sticks, Lego people
The Task: Push two tables together, make two stacks of books, turn over two cups, etc. and create a suspension bridge between the two surfaces. As with any good STEM project, plan, prototype, test, and make adjustments in order to construct your best creation!
Challenge 1: How long of a distance can your bridge span before it falls?
Challenge 2: Build a bridge that will hold a Lego person (or other small toy).
Challenge 3: Oh, no! The Lego person is stuck. Build a ladder from the table/floor to your bridge to rescue them.
Challenge 4: How strong can you build your bridge? Suspend a cup or other small container from your bridge. How many weights (coins, marbles, etc.) can you add before it collapses?
Challenge 5: Build your own supports for your suspension bridge. How tall can you build it?
